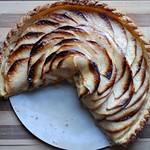
(I’m totally avoiding doing work right now. I feel semi-bad. If you decide to make this cake and it makes you happy, please let me know – so I can take comfort in knowing that my shirking creates some good.)
When Spends2Much and I sunk our plastic forks into the yellow cake with chocolate icing at Amy’s Bread in Chelsea Market (see slideshow here), we fell in love with the wholesome goodness of yellow cake all over again. As she put it – it’s what birthday cake from your childhood is supposed to taste like.
After much-o Googling and checking out The Sweeter Side of Amy’s Bread, here’s the recipe adjusted to weights. I do this so I can feel precise. I also do this so I don’t need measuring cups – I just get one scoop and pile the ingredients onto my scale using the one scoop (and a trusty paper towel in between ingredients).
You will need
1 pound/474g sifted all-purpose flour OR 50-50 cake & all-purpose*
15g baking powder
3g salt
330g milk (not skim!)
10g vanilla
315g unsalted butter, at room temperature
690g granulated sugar
5 large eggs (roughly 250g without shells)
*Using cake flour is supposed to make your cake slightly drier since it’s more absorbent.
1. Preheat oven to 325 degrees. When baking cakes, lowering the temperature will help it stay flat on top and bake more evenly. It takes longer, but is so worth it in my opinion.
2. Butter two 9″ round baking pans or whatever baking pan you’re using. Dust with flour and tap out the excess. Line the bottom with parchment paper, and dust lightly with flour as well.
3. Sift together dry ingredients.
4. With a paddle attachment on an electric mixer, cream butter and sugar together on medium speed for three to five minutes, until light and fluffy. Add in eggs one at a time, mixing well after each addition. Add in vanilla with the last egg.
5. Add in the dry ingredients in three parts, and the milk in two parts. Mix well after each addition. You may want to drape a towel over the mixer when adding the flour to prevent it from going everywhere.
6. Make sure everything is well mixed together and there are no pockets of dry ingredients. Pour into pan and put into oven. Bake for about 40 minutes. The edges will start to pull away from the pan, and the edges will also be golden brown. (Delicious crispy edges, anyone?)
7. Remove from oven. Let cool slightly in pan, and use a knife or small spatula to loosen the edges before inverting onto a cooling rack. Once on the cooling rack, quickly invert it again so the cake is right-side-up to prevent crumbling into pieces.
8. I’ll get to the icing in my next post. Meanwhile, you can wrap these in cling film and store in the freezer until you need them. I hear it helps with making the cake extra moist when serving!

So much cake mix that you’ll wonder if the bowl will overflow…

In our case, it was perfect for a giant pan (12×17″ roasting pan)

Baking at a lower temperature helped in this case with such a large cake

All done, all golden, very yummy. Apartment smelled deliciously buttery.

Gasp – we’re cutting them into boat shapes!
Draw your own stencil and cut out shapes straight from the freezer using a sharp knife

Don’t eat too many scraps.
Oh, who am I kidding, eat them all.

The boat layers all wrapped up in cling film again,
to make its final appearance on Saturday – stay tuned!


