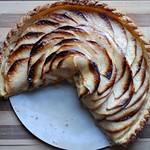
An attempt at a tulip – pulled sugar
Ever since the chocolate exam, classes feel like they’ve gone by in double time. We had our written exam – the last time someone was going to grade me on my knowledge of sugar, butter, flour, and chocolate. Then we were off to the land of some serious sugar art.
The way the classes are set up for sugar, is that we have two demonstrations in the traditional setting, but we have two regular 2.5-hour practical classes, plus three(!) 6-hour “ateliers” where we can start designing our final exam sugar showpiece.
For the demonstrations, the chef showed us how to make pulled and poured sugar, assembling it all together into a showpiece that would be similar to the exam requirements. We are supposed to make a piece that features at least three roses, some leaves, some twirly decorations, and perhaps a ribbon.
Then for our last demonstration ever at Le Cordon Bleu, the chef made blown sugar fruits. Blown sugar is more like pumping air into a lump of sugar to form a ball – no actual “blowing” required, sorry to disappoint. It looked delicate and fun as the chef pulled off an apple, a pear, an orange, a lime, a banana (he was careful to make sure it couldn’t be mistaken for anything else), a kiwi, and a peach (that had a questionable tip at the end). Once he was done, we had some extra time so he also showed us how to make a large bird.
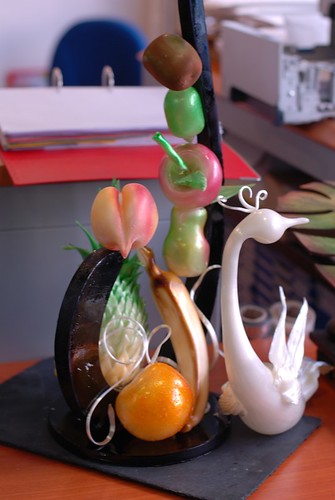
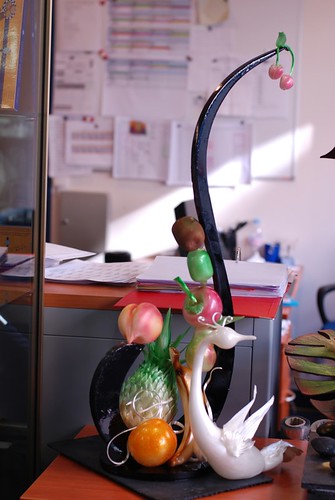
The chef’s sugar showpiece for my very last demonstration at Le Cordon Bleu!
Features blown sugar fruits airbrushed with colour, pulled sugar leaves & stems, and a poured sugar base.
In the practical classes, we began by pouring sugar. My poured sugar piece is kind of like the background I’m planning to use for my final exam – somewhat of a wreath concept. Pouring sugar was pretty straightforward – we cook the sugar to an exact temperature, pull it off and mix in colour, then wait for it to become the right consistency before pouring into moulds waiting on the marble surface.
The tricky part actually came at the end, when we had to stick the pieces together by heating up the sugar pieces with a blow torch. If not heated enough, the sugar wasn’t going to stick firmly. However, if heated too much, as was the case with a couple of my classmates, the sugar un-sets and starts bending due to the heat. Whew!
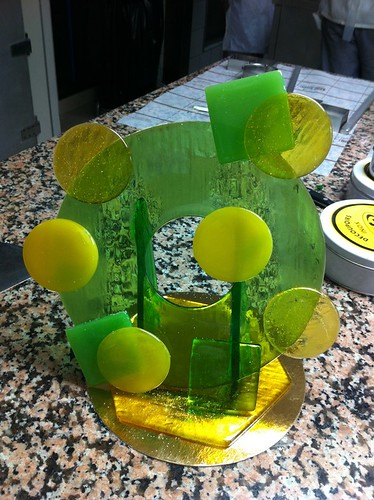
My first try at pouring sugar. I really liked the milky green – reminded me of jade!
The next class was an atelier where we just pulled sugar. After all that hype about pulling sugar, I walked into this class feeling really nervous and uncertain. At that point we had only seen one demonstration and I just didn’t feel ready to be producing flowers and leaves. However, as we set up to cook the sugar and start pulling, the chef came by and showed us individually how to work with the sugar and set us to work with practicing leaves first. Surprisingly, making the leaves came to me pretty quickly and before I knew it, I had completed his “assignment” of making 50 leaves in record time. The chef really liked the leaves I made, too!
Working with pulled sugar means having a sugar lamp to keep the sugar warm and soft at all times. For this class, we were working directly under the lamp (some chefs recommend taking a small piece off of the lamp and working away from the heat). By the middle of the atelier when we had a break, I had sweated buckets, felt warm and nauseous a few times, and stood aside to gulp down cold water for “mini breaks” too. I knew my hands were slightly chafed and really warm, but I did not expect this:
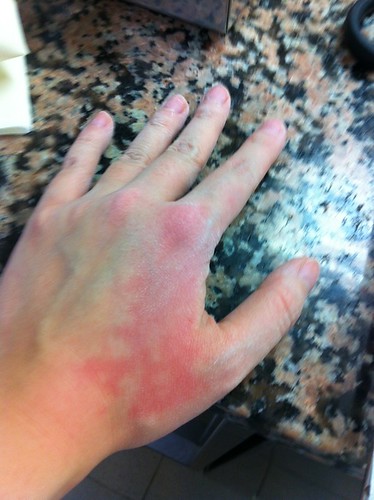

My poor, slightly burnt, and really creepy looking left hand…plus the leaves I made with that sacrifice!
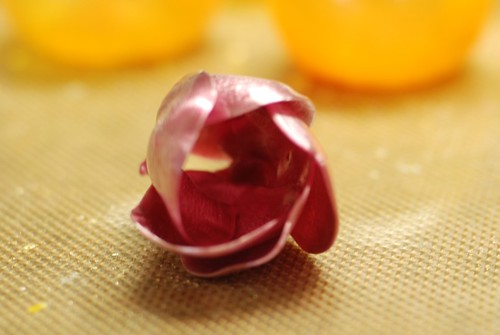
After the little break, we were back at it with flowers – finally! Making roses is very trying on my patience…as soon as I took my attention away from arranging the petals nicely, my flowers would start taking on weird shapes. I think I liked the orange flowers more, but the white and yellow-ish ones were a little questionable – definitely don’t qualify as roses.
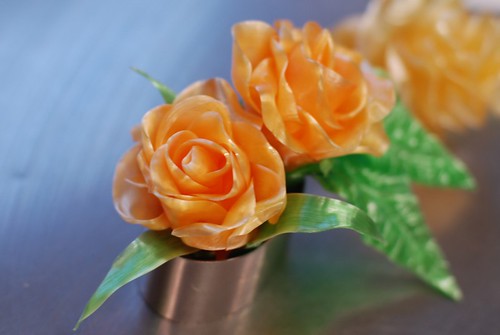
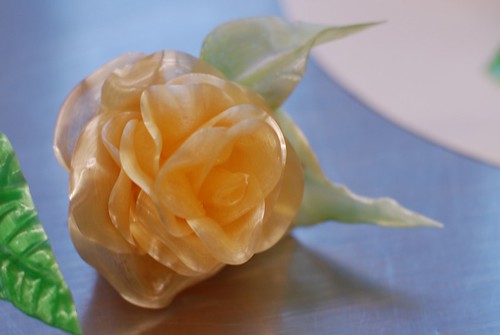
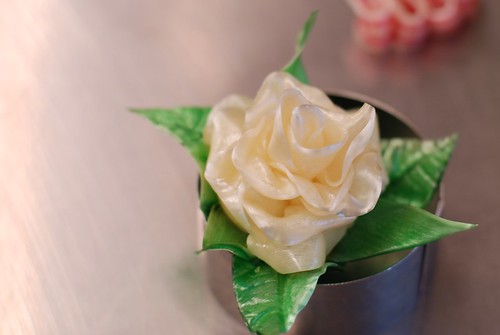
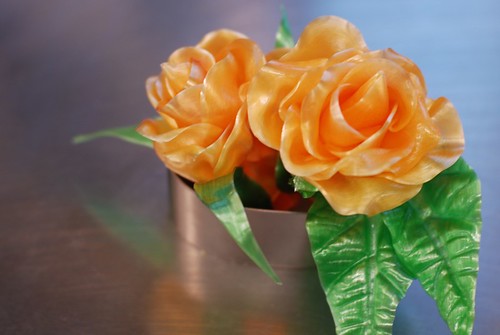
“Roses” with leaves
Finally, we had a short practical class to practice blowing sugar. To start, it was a little disastrous as nobody really had a grasp on the proper temperature and set up of the sugar on the little pump. We were all pumping out (literally) weird shapes, cracked or broken ball shapes, or nothing at all. A couple of times, there were even explosions as the sugar set too quickly during pumping, and shards of thin sugar flew everywhere. Eventually, we figured out the optimal temperatures to work with, especially given our experience and the speed at which we could work. By the end of the class, I had produced some ball shapes I could finally be proud of.
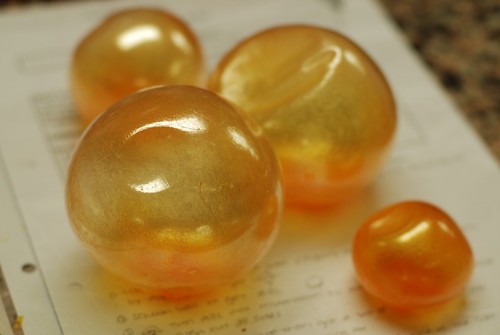
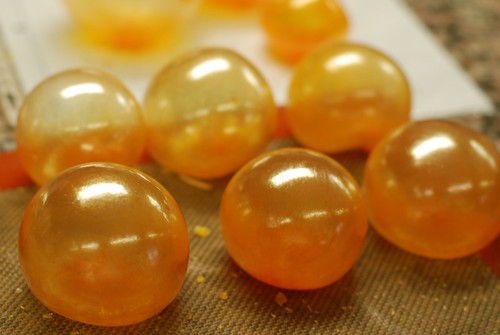
Left: bad, dented balls, right: good shiny balls
I really like the ball shapes, but for now, I can’t decide if I would use them on the final exam. They require a different recipe, which means for the exam we would be cooking three recipes if we wanted to do poured, pulled, and blown sugar. Each recipe takes about 20 – 25 minutes to cook, so that’s quite a bit of time taken out of the exam to just stand around and watch the temperature like a hawk. Good thing is I still have two more 6-hour ateliers to sort myself out and decide what my final exam piece will look like!
I’m excited about the sugar section so far, and super stoked about the final exam. It will be my last ever piece made at Le Cordon Bleu, unofficially marking the end of my year off to do things I love. Therefore, I want to go out with a bang and make something special to commemorate the year I’ve had. We’ll see how I do – wish me luck!
These are beautiful! I have enjoyed following your adventures – good luck on the exam!
This looks so hard to me, I don’t know if I ever would be able to learn it. It is beautiful though. My project for Easter will be mastering (or at least trying) croissants. Do you have some nice recipes to recommend?
PS. How was Oslo?