My chocolate exam ‘creation’
In Superior Pastry, we have two practical exams, and one written exam. The first exam quickly snuck up on us…and it was on chocolate tempering. Chocolate tempering means taking melted chocolate through a “temperature curve” to get it to set with shine in the end. A clean snap when the chocolate has set indicates good quality and well-tempered chocolate.
We had a few classes to “prepare” before the exam – you know, time to come up with designs we liked, test them out, perfect our tempering skills so our chocolates were super shiny, etc. The exam topic is always a chocolate box, shaped by a cake ring mould, with a lid and decorations on top. The school provides moulds for us to work with for our decorations, but creativity with placing these shapes also constitutes part of our grade.
Tempering chocolate is a messy business as melted chocolate tends to run everywhere, so every class was a little stressful, and our uniforms were all quickly stained with chocolate blotches in random places.
The first class, we were asked to fill a mould to make a picture frame, and make an upside down box to serve as a platform for the picture frame. I cooled down my chocolate a bit too much so it became “over-crystalized”, meaning that even at the correct working temperatures, the chocolate texture was much thicker than normal. This made for all sorts of annoying quirks, like my chocolate setting way too quickly before I even finished filling my mould! The result was an unevenly finished chocolate frame, and a bottom stand with holes in the corners. The cool thing, though, was that it wasn’t hard to pipe out the weird wiggly lines at all when my chocolate was so thick, so at least I got something right.
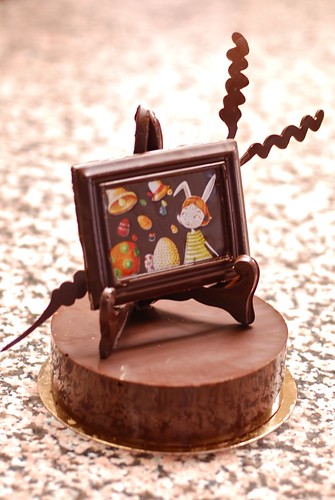
The picture frame with a standard image from school
We made some caramel chocolate candies for the second class, which was a bit different. Filling out the little chocolate moulds means we had to work fast, try to stay clean with all of the excess chocolate dripping everywhere, and make a delicious caramel centre to fill the chocolates with. The class went OK, but the best part was definitely the end result – delicious caramel chocolate candies just in time for Valentine’s Day!
The next class just before the exam, I tested out my “design concept” (loosely termed, really didn’t take much thought, bah) with some hearts and ball shapes. However, the balls didn’t work out nicely because the yellow streaks of cocoa butter messed up the chocolate texture a bit, so by the end of the class, I didn’t have many pieces to work with. Also, one of the hearts broke when I tried to un-mould it, so the box I made was pretty scarcely decorated, and definitely not very original.
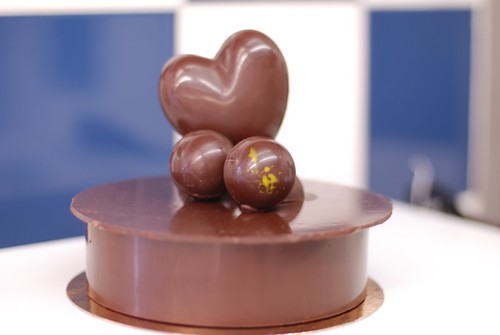
My chocolate box – before the exam
However, as you can see, most of the time, the chocolates I made in class came out tempered and shiny-ish anyway…so I walked into the exam after a long weekend in London and just thought to myself – “I can’t exactly fail this…hopefully.”
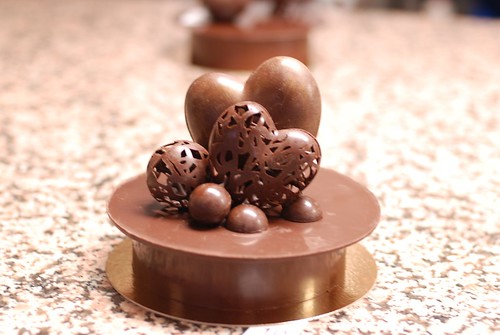
While my friend and I spent the five days before the exam in London eating our hearts out everywhere, our classmates were busy at work planning out their chocolate boxes! Mine ended up being not-so-original, and if you look closely (and from different angles, as the chefs are wont to do), there was a huge chunk of the lace heart missing in the back. Oh well. I slyly hid it with some other pieces, but one swift move by a chef checking out my piece would’ve revealed the gaping hole in the back.
So far, I haven’t received a call yet about failing this exam, so I think we’re safe. Also, I am glad that for now, I’m done with tempering chocolate under time constraint and exam pressures! :)

One last look at my chocolate exam creation…
Next up, we move into another crazy concept that’s not exactly edible – sugar work!
