≡ Menu

Resolutions + A Wallpaper

Happy New Year!

Now that we’ve gotten another overhyped party out of the way, I’m excited to start 2011. (The bitterness for the celebrations: they always feel mandatory, and end up somewhere on the spectrum of “fun”, but the street car wait & ride home last night at 3AM made me question if I should retire from celebrating at midnight every December 31 officially).

Onto 2011. This year, I promise I will make some serious changes in my life. There are some plans in motion to make sure that we get to see more of the world and enjoy life in different ways, and I can’t wait to share all the updates as they unfold. Of course, we’re also getting married in 2011, so it’s going to be a big year!

I also hope to blog a bit more often – coming up I’ll have a couple of regular “weekly columns” to make sure I have a good reason to write as much as I can.

Lastly, I want to make sure I continue to take many more photos! I’m going to be getting a new camera bag soon to help me tote around the camera a little more discreetly, and we’re swapping in for a different lens to play with, too. The last thing that I’m doing, that will hopefully help me update more often and take more pictures, is the monthly wallpapers.

Beginning of every month, I’ll post a photo wallpaper for download. So far, I’ve made them in two sizes only – my Mac and my work laptop. If you’re interested in having a resolution that’s right for your computer, just leave a comment and I’ll see what I can do next month. Suggestions for the following months would be super helpful, too!

January 2011 Wallpaper 1280x800

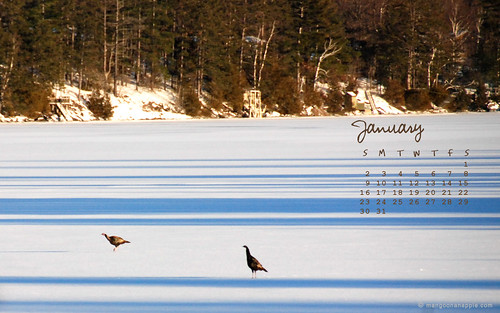
Download the 1280×800 (standard Mac size) wallpaper
Download the 1024×768 wallpaper

{ 5 comments }

In 6 Months…

Ring pillow
Ring pillow from GiggleRoom on Etsy

In exactly 6 months, it’ll be a really sunny and warm day. It’ll be my favourite time of year. And…Alex and I will be getting married on that day!

Life’s kinda sneaked up on me in the past few months that I feel like in the blink of an eye, we’re at the second last day of 2010. Even though we’re getting married in 6 months, I haven’t actually gotten much planned. We’ve booked some of our vendors, found a nice little place by the water to get married, and I’ve ordered a dress. That’s about it. The rest of the planning will hopefully come in a frenzy in the next couple of months – especially because we’re taking a week off in January to go to Vancouver to sort out the details (our own version of a wedding planning bootcamp, one might say).

The most important thing, though, is that we’ve actually started telling our friends the details! I know I’m typically an OCD party planner (yes, I admit it), but when it comes to my own things, I get a little shy about taking control and thus am terribly behind on hashing out the details.

We did send out some really fun Save-the-Dates, though.

Save the Date Cookies

I’ve had the idea of COOKIE! SAVE THE DATE! brewing in my head since early summer, but finally put words to action late in October. I baked 90 cookies (in case of spoilage or stress-eating), flooded them with icing, and wrote out the details in 3 different colours of icing with super-thin tips (Ateco #1) on half of them. For the other half, I decorated them with swirled designs. Then we wrapped each cookie individually in cling film, put them in windowed paper boxes lined with tissue paper, along with a paper version of the cookie so that people didn’t eat the details and forget about us (ha). To finish the look, I tied colourful baker’s twine around the the box. Each box was first enveloped in a layer of bubble wrap before being wrapped finally in fancy kraft paper that I had found at Target. The very last step was affixing wrap-around labels that I had designed and printed myself on each package, and finishing off with Japanese clear packaging tape with a white lace design on the back.

Phew. Thank goodness we only had to do about 25 of these packages.

Save the Date Cookies  Save the Date Cookies

The lady at the post office was impressed with, but also scared of us as we fished box after box out of our carrier bag to be weighed and mailed across Canada, to the US and to the UK. The cutest thing, though, was that we discovered we will celebrate the same wedding anniversary as this nice and patient lady at the post office!

Hopefully I will be a little bit more on top of updating wedding details in 2011 :-)

{ 3 comments }

Homemade Peanut Butter Cups

Homemade Peanut Butter Cups

When I was in high school, my family lived on a street where landscaping was a bit of a competition. I have not-so-fond memories of spending spring break carting yards and yards of dirt from the driveway into our newly dug up flower beds. Our next door neighbours were especially good at landscaping, and the lady next door was often seen in her garden on sunny days.

The family next door not only inspired everyone on the street to keep beautiful lawns and gardens, but they also served wonderful snacks whenever we went over for tea and coffee. The lady of the house, Pat, was generous and often copied the recipes down for my mom and me to try at home, and to this day my mom still has a folder with recipes handwritten by Pat on pretty paper. The last time I was home, I got them all down on my computer and have been meaning to recreate some of them.

Since I recently came across a really delicious jar of peanut butter, I thought I’d start with the Peanut Butter Cups. You can also make these into bars – just the peanut butter layer on the bottom, with chocolate on top – to make life easier.

Peanut Filling (makes enough for 48 cups, or a 8×8″ pan)

  • 1/2 cup graham cracker crumbs
  • 1 and 1/4 cups icing sugar
  • 1 cup creamy peanut butter
  • 1/2 tsp vanilla
  • 1/4 cup melted butter

You’ll also need

  • Chocolate chips, melted, for coating…or chocolate wafers. Don’t be quick to judge, there are better tasting wafers available these days! I’ve recently seen Ghiradelli candy coating, and the ones I buy are “Belgium premium chocolate wafers” from Bulk Barn. Alternatively, you could temper real chocolate. You’ll need about 3/4 cup for the Pan Method, or about 1 pound of chocolate wafers for the peanut butter cups.
  • A peanut butter cup chocolate mould or a 8×8″ square pan, lined with parchment.
  1. Mix all the ingredients for the peanut butter filling together thoroughly, and let chill in the fridge for about 15 minutes just until it gets firmer.
  2. Roll into small balls about the size of table grapes, and press down slightly so it’s about the size of a quarter, just thicker. Or, if you’re making this in a pan, press all of the peanut butter filling firmly on the bottom.
  3. Fill a peanut butter cup chocolate mould with a thin layer of chocolate. Tap the sides to get the chocolate to spread flatly, and put into fridge to set for a few minutes. Pan method – spread the melted chocolate evenly across the top of the peanut butter filling, and let set in fridge.
  4. Put the flattened peanut butter in the middle of the chocolate cup, and drizzle melted chocolate on top, again tapping to ensure everything flattens out. Pan method – you may want to score the bars with a sharp knife halfway through setting to ensure you can cut through the chocolate easily once it’s set.
  5. Return to fridge to set, about 15-20 minutes, before inverting the mould onto a clean work surface and extracting the cups one by one.

Homemade Peanut Butter Cups

{ 3 comments }