
Wait, before you turn away thinking you have no time for canning and jamming and the sort of crazy domesticated things that take too much time, this does not require canning. In fact, I’m not sure if you can preserve it – probably, but why would you when you can stick it in the fridge and eat it with a spoon any time you want? Also, this is really not a jam – it cheats by having a bit of fat added to keep the ingredients setting beautifully. So I’m not sure you can define it as a jam. Okay, disclaimer over.
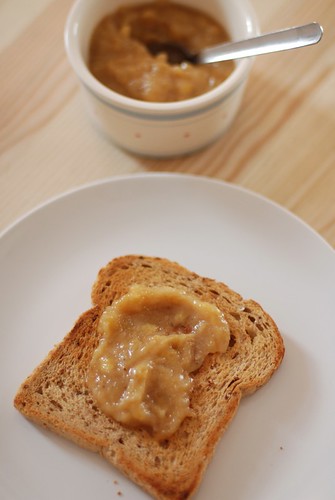
This happened, guys! I made a banana jam that is eerily similar in taste to the elusive banana jam at my favourite restaurant in London. What is a banana jam, you say? Well, the first time I tried it I was skeptical, too. It’s basically the best bits of the banana flavour, packed into a spoonful of jammy consistency, to make your toast shine. Seriously, amazing. I have stalked this famous banana jam before – it is only available at the Ottolenghi Angel location, during breakfast/brunch hours, and it’s NOT FOR SALE! Despite the array of jams and sauces you can buy from the Ottolenghi empire, this jam is just too priceless for purchase.
So of course I’ve tried to re-create the recipe before. There are some bits and pieces posted around the web of people trying to make the jam. However, both times I tried, I failed to bring up the intense banana flavour clearly, and the addition of fruit juices seem to encourage the bananas to get starchy and almost powder-y.
This time when I made it, the stars were just aligned, and the whole experience was sort of accidental. I had bought amazingly fragrant green apples that morning from a little farm market stand, tried a small piece when I was cutting them up for apple crisp, and almost died from the tartness. Since I couldn’t possibly eat the leftover apples on their own, I decided to cook them into an apple-filling-like sauce for Alex’s breakfast porridge. However, I didn’t have enough apples to make a substantial filling, so out of the corner of my eye I spied the overripe banana sitting in the fruit bowl innocently, and added it to the mix. What do you know – I ended up with a banana jam that I couldn’t stop eating straight out of the pot!
The recipe uses coconut oil as the fat base. First of all, lesson learned – fat, I believe, helped the banana preserve its integrity without breaking down into starches quickly; so don’t hate on the fat! Second of all, I wouldn’t recommend using butter or margarine as a replacement; the creaminess from the dairy taste might compete with the bananas. I also would be hesitant to try cooking oil instead of coconut oil, because I’m not sure how it’ll caramelize with the sugar. But hey, what do I know, I’m just happy I made a good thing and a little reluctant to ruin it! You’re welcome to try and tell me how it goes!
Banana Jam just like Ottolenghi’s – makes a very small batch to enjoy with your morning toast during the week :)
- 1 tbsp (15g) coconut oil
- 1 tbsp (15g) granulated sugar
- 1 tsp (5g) honey
- 1/4 of an apple, peeled, cored, and diced
- 1 ripe banana
- Melt the coconut oil in a small heavy-bottomed pot. Add in the sugar and honey, and stir occasionally to make sure the sugars and oil mix (they tend not to like each other).
- When the sugar starts to caramelize (i.e. turn golden-brown) in some spots, add the chopped apples in. Stir to combine, and cook over medium heat, letting the apples soften and break down. If any sugar decides to get chunky and stick to your spoon, just scrape it off and let the apples melt it back down.
- When the apples are pretty mushy, slice in 1 ripe banana. Continue cooking, mashing as you go along. It won’t take long now!
- You’ll know it’s ready when you can scrape the pot with your spoon and see the bottom of the pot clearly for a few seconds before the jam covers the track back up again. The apples and bananas should be pretty broken down by now, although you may have a few chunks – it’s all personal preference, really!
- Keep in a covered container in the fridge. I kept mine in a ramekin for about a week (okay, fine, 5 days and it’s all gone!)
Give it a whirl and let me know how it goes! The ingredients are easy to find*, and the taste is unbeatable.
*Coconut oil is my new obsession. You can find it at most supermarkets now, usually in the healthier, “alternative choices” section. It’s not too expensive, and I don’t use it in everyday cooking. I find it works well with roasted carrots or sweet potatoes, in carrot cakes and banana breads, and even in brownies. Plus, the health benefits are all over the Internet.